

Your home should be a place where you feel safe, comfortable, and at rest. But moisture problems in less visible areas, like crawl spaces, can eventually lead to musty odors, mold, pest problems, and poor indoor air quality.
Crawl space waterproofing and encapsulation can help protect your home from these issues. In this guide, Zook Cabins explains the difference between the two, their costs, benefits, and DIY considerations.
(And just to be clear, this blog is about basement crawl spaces, not attic crawl spaces.)
Why Do Modular Homes Need Crawl Space Foundations?
The truth is, not all modular homes require a crawl space foundation, but all modular homes do require a permanent foundation. One of the biggest advantages of choosing a crawl space foundation is its affordability. In many cases, crawl space foundations cost significantly less than basement foundations, often coming in at about half the price.
What is Crawl Space Waterproofing?

Crawl space waterproofing is intentional water control, designed to keep any excess liquid like water, away from the foundation of your home. This is done through exterior and interior drain systems like French drains, sump pumps, vapor barriers, and foundation sealing. It can also include applying a waterproof coating to the walls of your crawl space.
Waterproofing your crawl space is critical if you have standing water issues or if your crawl space consistently floods during heavy rain. Crawl space waterproofing will prevent water from damaging your interior.
What Causes Water and Moisture in a Crawl Space?

Maybe you thought you did everything right and still don’t understand why in the world you have so much moisture and water in your crawl space. Don’t panic; it might be one of these common problems.
| Problem | Effect |
| Poorly graded yard | The soil slopes towards the foundation, instead of away from it, leading to standing water |
| Foundation cracks | Water can easily enter through improperly sealed blocks |
| Clogged gutters | Liquid gets backed up and overflows |
| Exposed dirt floor | Moisture vapor rises from the damp floor into the crawl space |
| High groundwater | Water rises from below during rainy seasons |
| Short downspouts | Roof water dumps too close to foundation |
Signs Your Crawl Space Needs Waterproofing
The problem with crawl spaces is that they aren’t very visible, making them easy to ignore. That’s where most homeowners go wrong, leading to more problems down the road. To prevent this, look out for these common signs:
- A musty smell in the house or basement– this is a key indicator of moisture issues
- High humidity– if your house is constantly humid, excess moisture could be getting in
- Visible mold- don’t ignore this; it can lead to long-lasting negative health issues
- Pest activity– rodents and insects like the damp, dark spaces, and they can be a sign of something bigger going on
You can also follow this checklist and score your home to identify the improvements needed.
- I smell musty odors in the house.
- There is standing water in the crawl space.
- The crawl space has exposed dirt.
- The insulation is sagging or falling.
- The floors feel cold or soft.
- I have noticed pests or insects.
- The crawl space feels humid.
- There is visible mold or wood staining.
- My gutters or downspouts drain close to the foundation.
- My home has open crawl space vents.
| Score | Risk Level | Recommended Action |
| 0–2 | Low | Monitor the crawl space and fix any visible drainage issues like a clogged pump |
| 3-5 | Moderate | Call a crawl space inspector to get a professional opinion |
| 6-8 | High | Consider waterproofing or encapsulation |
| 9-10 | Severe | Get professional assistance for mold control and water damage |
Does Every Crawl Space Need Waterproofing?
The short answer is no. There are multiple factors that play into whether a space should be waterproofed or not. If your crawl space has good landscaping and a properly graded yard, it will reduce the amount of moisture and water entering the basement. But if you live in an area with high rainfall and your home is on low ground, waterproofing and encapsulation will be highly beneficial.
Additionally, if the crawl space is dry and has no moisture problems, you may not need a full drainage system. But if the crawl space has water, mold, or high humidity, waiting usually makes the repair more expensive later.
For the most clarity, we highly recommend reaching out to a professional inspection company who can help you decide if your space needs it or not.
Common Crawl Space Waterproofing Solutions
There are so many different ways to approach the problem of excess water and moisture. Here are the most common solutions:
Gutter and Downspout Cleaning and Extensions

Keeping gutters clean and extending downspouts away from the foundation helps prevent roof runoff from draining directly beside the crawl space. Even a 1-inch rain on a 2,000-square-foot roof can dump about 1,250 gallons of water onto the home. Without working gutters and downspouts, a lot of that water can end up soaking the soil beside the crawl space foundation. The University of Minnesota Extension explains this problem clearly in its guide on basement moisture causes and solutions.
The good news? This is a relatively easy and affordable fix! Homeowners should start by cleaning out the gutters at least twice a year. Gutters should also slope at least 1/16 inch per foot toward the downspout.
When it comes to downspouts, they should not dump water right beside the house. As a practical minimum, extend each downspout at least 5 feet away from the foundation onto a sloped area. If the downspout connects to an underground drain or catchment system, the Department of Energy’s Building America Solution Center recommends discharging that water at least 10 feet away from the foundation and not connecting it to the foundation drain system. For a simple homeowner project, use a plastic or aluminum downspout extension or a buried solid drainpipe that slopes away from the house.
Yard Grading and Exterior Drainage

Proper yard grading helps move surface water away from the home so it doesn’t pool near the foundation, which causes water to leak into the crawl space. In some cases, exterior drainage systems may also be needed to keep water from collecting near the foundation.
A good target is to slope the soil away from the foundation at least 0.5 inch per foot for the first 10 feet where possible. That equals about a 5-inch fall over 10 feet. The Department of Energy’s Building America guide on final grading offers the same recommendation to help move stormwater away from the foundation.
Homeowners can check this with a 10-foot board and a level. Place one end of the board near the foundation, hold it level, and measure the gap between the board and the ground at the far end. You want the ground to be several inches lower as you move away from the house.
For a simple grading repair, remove mulch or decorative stone near the wall, add clean fill soil around the foundation, and shape it so water flows away from the home. Do not pile soil above siding or vents. Keep mulch shallow near the foundation, usually around 2 to 3 inches, because thick mulch can hold moisture against the house.
If you cannot create enough slope due to a sidewalk or a low yard, you may need a French drain. You can follow this guide for a French drain installation, which includes a common trench size of about 9 inches wide and 18 to 24 inches deep, with the trench sloped about 1 inch for every 10 feet of pipe.
Interior Drainage System
An interior drainage system is used when water is already entering the crawl space and needs a controlled path to a sump pump or drainage outlet. Instead of letting water spread across the crawl space floor, the system collects the water near the perimeter or low areas and directs it to one collection point.
This is not a DIY project most people should undertake. For homeowners comparing contractor quotes, ask for specifics. The drain should collect water from the problem areas, direct it to a sump basin, and be installed so it does not clog easily with mud or debris.
Sump Pump

A sump pump removes collected water from the crawl space and pumps it safely away from the home. Proper installation and piping are important so the water does not drain right back toward the foundation.
A sump basin should be placed in a low area where water naturally collects. Building America states that crawl space sump pits are often 2 to 3 feet deep and should be installed so accumulated water can be removed before it reaches the crawl space floor. The pump should also have a check valve so water does not flow backward into the pit after the pump shuts off. The discharge pipe should carry water well away from the foundation; it should run the discharge at least 10 feet from the house onto a splash block so it does not re-enter the basement or crawl space area.
Vapor Barrier

A vapor barrier is a thick plastic liner that is installed over the crawl space floor and sometimes up the walls to help block ground moisture from rising into the crawl space. This prevents the water from damaging the crawl space and is a critical part of the encapsulation process.
For a basic crawl space, the minimum vapor barrier is usually 6-mil polyethylene, but for a more durable encapsulation system, homeowners often choose 10-mil, 12-mil, or 20-mil reinforced liner. A thicker liner is harder to tear and holds up better if people need to crawl over it for inspections.
Vent Sealing

Crawl space vents were traditionally installed to let outside air dry the crawl space. The problem is that in many humid climates, outside air can make the crawl space wetter, not drier.
With a full encapsulation, part of the process is sealing the vents so humidity can’t get in. For a basic homeowner repair, cut rigid foam board to fit the vent opening, place it tightly inside the vent, and seal the edges with exterior-grade caulk or spray foam. Do not just stuff vents with fiberglass insulation, because it can absorb moisture and become a mold or pest problem. And don’t forget to seal gaps around plumbing, wiring, rim joists, and the crawl space access door.
However, it is important to note that you still need some sort of moisture control plan if you seal the vents off, otherwise you will just trap the moisture inside. This can be remedied with installing a dehumidifier which we’ll explain more about in the next section.
Crawl Space Dehumidifier

A crawl space dehumidifier helps control humidity after the space has been sealed. This is especially important in humid climates or homes with ongoing moisture concerns.
The EPA recommends keeping indoor relative humidity below 60%, and ideally between 30% and 50% when possible, to reduce mold risk. In a crawl space, a practical target is often around 50% to 55% relative humidity. That gives a little buffer below the 60% danger zone without forcing the dehumidifier to run nonstop. The best way to measure this is to have a digital hygrometer in the crawl space.
For best results, we suggest you choose a crawl-space-rated dehumidifier and check the filter frequently, usually around every 1-3 months.
Crawl Space Waterproofing vs. Crawl Space Encapsulation
As mentioned in the beginning, we’ve also used the term encapsulation. But what’s the difference between crawl space waterproofing and encapsulation? Both waterproofing and encapsulation work together, but they address different problems.
Waterproofing focuses on liquid water and addresses why water is getting into the crawl space then fixes that by adding better drainage systems and waterproofing coating on the walls.

In contrast, crawl space encapsulation is a much larger project and is focused on controlling the crawl space environment through sealing everything off with a heavy-duty liner to lower humidity and protect the home. This creates a clean, sealed-off dry crawl space.
| Crawl Space Waterproofing | Crawl Space Encapsulation |
| Focuses on liquid water entering the crawl space. | Focuses on humidity and moisture inside the crawl space. |
| Helps stop standing water, leaks, and seepage. | Helps seal the crawl space off from outside air and ground moisture. |
| Often includes drainage systems, sump pumps, downspout fixes, grading, and wall waterproofing. | Often includes a heavy-duty vapor barrier, sealed vents, wall liner, insulation, and sometimes a dehumidifier. |
| Solves the problem of water getting in. | Solves the problem of the crawl space staying damp, humid, dirty, or musty. |
| Best for crawl spaces with flooding, puddles, seepage, or drainage issues. | Best for crawl spaces with exposed dirt, musty smells, high humidity, mold concerns, or sagging insulation. |
| Usually comes before encapsulation if water is actively entering the crawl space. | Works best after water problems have been corrected. |
| Protects the foundation and crawl space from water damage. | Protects the home above from humidity, odors, mold risk, pests, and poor air quality. |
What is More Affordable: Crawl space Waterproofing or Crawl space Encapsulation?
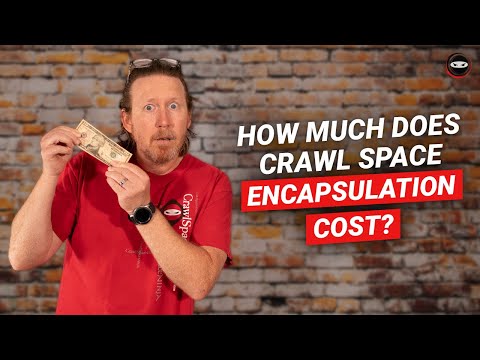
Basic crawl space waterproofing is usually more affordable than full encapsulation. For example, extending downspouts or installing a basic vapor barrier may cost much less than a complete encapsulation system.
But if the crawl space has ongoing moisture or humidity problems, cheaper fixes may not solve the full problem. It is often worth it to bite the bullet and invest in a good quality encapsulation to remove worries for the future.
It also depends on which method you choose to do, DIY or professional. According to a price study done by Home Advisor, basic encapsulation by a contractor costs between $2-4 per square foot, while a full encapsulation is anywhere from $3-10 per square foot. Fixr also quotes encapsulation as having a national average of $4,500, or around $2-6 per square foot.
DIY will be much more affordable, especially if you have most of the materials. However, you have to figure in the cost of your labor and time.
| Option | Typical Cost Range | What It Usually Includes |
| DIY Crawl Space Waterproofing | $100–$1,500 | Gutter cleaning, downspout extensions, minor grading, small crack sealing, and basic drainage improvements |
| Professional Crawl Space Waterproofing | $1,500–$10,000+ | Interior drainage systems, French drains, sump pump installation, discharge lines, exterior drainage, and grading corrections |
| DIY Crawl Space Encapsulation | $750–$3,500 | Vapor barrier material, seam tape, fasteners, vent covers, basic air sealing, and covering exposed dirt |
| Professional Crawl Space Encapsulation | $5,000–$15,000 | Heavy-duty vapor barrier, sealed seams, wall coverage, vent sealing, crawl space door sealing, dehumidifier, drainage, and sump pump if needed |
Encapsulation Cost by Crawl Space Size

Another key factor in cost is the size of your space which also affects what your space needs. To help with planning, we’ve compiled some numbers, based on sq feet. Based on national averages of $2-4 per square feet for basic encapsulation and $3-10 for full encapsulation, here are some estimates for your space.
Remember: The numbers below are broad planning ranges, not a quote. To get a verified quote, reach out to a local company.
| Crawl Space Size | Basic Encapsulation | Full Encapsulation |
| 500 sq. ft. | $1,500–$3,500 | $3,500–$7,500 |
| 750 sq. ft. | $2,250–$5,250 | $5,000–$9,500 |
| 1,000 sq. ft. | $3,000–$7,000 | $6,500–$12,000 |
| 1,500 sq. ft. | $4,500–$10,500 | $9,000–$18,000 |
| 2,000 sq. ft. | $6,000–$14,000 | $12,000–$24,000+ |
Is Crawl Space Encapsulation Worth It?

Absolutely. While our team specializes in providing you with a beautiful home from the sill plate up, we highly recommend this to keep the parts of your home you can’t see just as beautiful. Whether you just bought from us or it’s been a little while, this process can help maintain your home’s integrity for years to come.
The value is not only in making the crawl space look cleaner. The bigger benefit is protecting the home above it. Benefits include:
- Less moisture and humidity under the home
- Better protection against mold and wood rot
- Cleaner air and fewer musty odors
- Reduced risk of pest and insect problems
- A cleaner crawl space for future inspections or repairs
- Possible energy efficiency improvements
- Better long-term protection for the home’s structure
Can You DIY Crawl Space Encapsulation?

Yes, many people have attempted a DIY crawl space encapsulation and waterproofing. However, this is a lengthy process that involves a large time commitment, materials, and some skills. To learn more about a step-by-step process, you can reference the video above or follow this guide.
If you don’t think you have the time or resources to do this well, we suggest contacting a local company that can do it for you. Remember, it is both beneficial and critical to the long-term success of your home. And if you don’t know where to start, contact an encapsulation company; your general contractors may be able to suggest some trusted professionals in your area.
Materials for DIY Crawl Space Encapsulation

If you’re going to tackle the encapsulation yourself, you’ll need the right materials. Make sure you have these before starting the project. Expect to spend somewhere between $1,000-$4,000 for basic encapsulation materials. For a fuller DIY project, homeowners usually spend between $2-5,000.
| Material | What It’s Used For | Estimated DIY Cost | Example Material |
| Reinforced vapor barrier | Covers the crawl space floor, foundation walls, and piers to block ground moisture. A 12–20 mil reinforced liner is better than thin plastic for a real encapsulation. | $150–$900+ depending on thickness and square footage | 20 mil vapor barrier example |
| Seam tape | Seals overlapping vapor barrier seams so moisture does not pass through gaps. Do not cheap out here! Bad tape is one of the fastest ways for a DIY encapsulation to fail. | $20–$50 per roll | Crawl space seam tape example |
| Butyl tape or sealant | This is used where the vapor barrier attaches to foundation walls, piers, vents, and other hard surfaces. It helps create a tighter seal than seam tape alone. | $30–$50 per roll | Butyl tape example |
| Mechanical fasteners / termination bar | Holds the liner securely to block walls or concrete walls. Tape alone may eventually pull loose in damp conditions. | $20–$100+ | Stego notes termination bars/mechanical fasteners as standard encapsulation materials |
| Utility knife | You will need this for cutting the vapor barrier around pipes and vents. | $5–$20 | Utility knives |
| Measuring tape | Essential tool for all DIY projects! | $5–$25 | Measuring tapes |
| Crawl space light | Makes the job safer and helps you catch anything you might have missed. | $20–$80 | Work light category |
| Gloves | Protects hands during the DIY project. | $10–$30 | Work gloves category |
| Knee pads | A must-have if the crawl space is low. Encapsulation is slow work, and your knees will take a beating. | $15–$50 | Knee pads category |
| Respirator or mask | Helps protect you from dust, insulation fibers, mold spores, rodent droppings, and general crawl space debris. Use proper PPE especially if there is suspected mold or contamination. | $10–$60+ | Respirator category |
| Drainage matting | Installed under the vapor barrier when the crawl space has rough ground, gravel, or minor water movement. It helps create a drainage path and protects the liner from punctures. | $125–$300+ per roll | Drainage Matting |
| Foam board or spray foam | Used to insulate crawl space walls, rim joists, vents, and gaps. Building Science recommends moisture-tolerant crawl space wall insulation that keeps humid air from touching cold foundation surfaces. | Foam board: about $25–$40 per sheet. Spray foam kits/products vary widely. | 2-inch rigid foam board example |
| Dehumidifier | Controls humidity after the crawl space is sealed. This is especially important in humid climates or crawl spaces that still hold moisture after sealing. | $700–$1,500+ for crawl-space-rated units | Crawl space dehumidifier example |
| Hygrometer | Monitors crawl space humidity so you know whether the encapsulation and dehumidifier are actually working. Aim to keep humidity below 60%; many contractors prefer roughly 45–55%. | $10–$30 | Digital hygrometer example |
What to Expect from Professional Crawl Space Waterproofing and Encapsulation

There are multiple things you should expect and hold a good contractor to when they come to inspect and fix your crawl space through waterproofing and encapsulation. To ensure that you are getting the best company to do your encapsulation you should expect your installer to do the following things:
- Inspect of the entire process
- Diagnose what the crawl space needs, whether that is waterproofing, encapsulation, or both
- Prep work where all debris and dirt are cleared out
- Water control to fix underlying water issues and drainage systems installed if necessary
- Vapor barrier installation
- Sealing off all gaps, vents, etc.
- Insulation depending on the system
- Dehumidifier or something similar installed to manage humidity.
How long does crawl space encapsulation last?
A professionally installed crawl space encapsulation system can often last 15 to 20 years or longer, depending on the quality of the materials and how well it was sealed. A thicker vapor barrier, proper drainage, and a working dehumidifier or drying system will usually last much longer than a thin plastic sheet laid over dirt.
Homeowners should still check the crawl space every year or two for tears or signs of rising humidity. Here’s a simple inspection checklist you can follow:
- I see tears, holes, or loose seams in the vapor barrier or the liner is pulling away
- I have noticed standing water or muddy areas.
- The crawl space smells musty or damp or the crawl space feels humid or sticky.
- I see mold, mildew, or dark staining on the wood.
- I have noticed pest droppings, nests, insects, or rodents.
- The dehumidifier is not running or does not seem to be draining properly.
- The sump pump or drainage system does not seem to be working.
- Musty odors or humidity issues are showing up inside the home.
What is the difference between placing a vapor barrier and full encapsulation?
A vapor barrier is a plastic or polyethylene liner placed over the crawl space floor to slow moisture coming up from the ground. Vapor barriers are usually just for the floor, to control excess moisture rising up from it. Encapsulation is a more complete system that includes sealing everything and often adding insulation, drainage, a sump pump, and a dehumidifier.
In simple terms, a vapor barrier is part of the encapsulation process that helps with ground moisture, while the whole encapsulation is meant to turn the crawl space into a drier, more controlled area under the home. To ensure a good quality encapsulation, make sure to use a vapor barrier that is at least 10-20 mil thick.
Does crawl space waterproofing stop mold?
Yes, but it won’t address the current mold. Crawl space waterproofing can help prevent mold from coming back, but it does not magically remove mold that is already there. Mold needs moisture to grow, so the first step is always to stop the water source and lower humidity.
If there is visible mold on joists or subflooring, it will need to be cleaned and remediated before encapsulation. Otherwise, you may simply seal in a problem instead of solving it. This may feel like an extra headache, but the benefits of being mold-free are well worth it!
Do I need to have ventilation in my crawl space if it is waterproofed or encapsulated?

No, usually, an encapsulated crawl space should not have traditional open foundation vents. Open vents can let humid outside air into the crawl space, which can lead to more moisture issues you are trying to avoid. However, you need to install some form of air management. Depending on the home and local building code, that may include a crawl space dehumidifier, a small mechanical exhaust fan, conditioned air from the HVAC system, or another approved drying method.
The 2024 International Residential Code allows unvented crawl spaces when exposed earth is covered with a continuous Class I vapor retarder, and the space has an approved moisture-control method.
How long will it take to complete encapsulation or waterproofing for my crawl space?
This really depends. Most crawl space waterproofing or encapsulation projects take a few days, but the exact timeline depends on the size and condition of the crawl space. A simple vapor barrier installation may be done quickly, while a full encapsulation with drainage, sump pump work, mold treatment, and the whole nine yards will take much longer, up to a couple of weeks. Contractors will need to inspect the crawl space thoroughly to assess what is needed for the maximum benefit.
Does encapsulation or waterproofing improve my home’s resale value?

Yes, crawl space encapsulation may help your home sell better. The biggest value is usually in removing buyer objections. A clean, dry, sealed crawl space obviously looks much better during a home inspection than one with mold and standing water. According to the National Association of Realtors, home inspectors often look at crawl spaces for ventilation and insulation issues, and excess moisture can lead to mold and water damage.
So, while you may not see a dollar-for-dollar return on your investment, it will protect the sale of your home and improve buyer interest.
What are the most common mistakes people make when trying to encapsulate or waterproof their crawl space?

There are several big mistakes homeowners often make. The first and probably biggest mistake is covering the floor with plastic before fixing the actual water problem. Other common mistakes include:
- Using thin plastic that tears easily
- Failing to tape seams
- Leaving vents open in a humid climate
- Skipping drainage
- Not installing correct sump pumps or not installing enough
Do I need to have heating and cooling in my waterproofed crawl space for ventilation?
No, you usually do not need to heat and cool the crawl space the same way you heat and cool your living room. What you need is moisture control. Some encapsulated crawl spaces use a small amount of conditioned air from the HVAC system, while others use a dedicated crawl space dehumidifier or mechanical ventilation.
The right option depends on factors like your local code, climate, HVAC design, and what is all contained within the crawl space. For more information, we suggest you connect with a local company who specializes in encapsulation and waterproofing to find out what they recommend.
Is crawl space encapsulation covered by homeowners insurance?
Most of the time, crawl space encapsulation is considered preventative maintenance or a home improvement, so homeowners insurance usually does not pay for it by itself. Insurance may help with damage if the moisture problem came from a sudden covered event, such as a burst pipe, but it usually will not cover poor drainage, humidity, mold from neglect, or normal maintenance issues.
The Insurance Information Institute explains that standard homeowners policies are designed for sudden and accidental disasters, not the cost of cleaning and maintaining a home. We recommend that homeowners review their policy and ask their insurance agent about which aspects of the repair may be covered.
Will I need to waterproof or encapsulate more Crawl Space More than once?
Potentially, depending on how long you own your home. A properly done full encapsulation job will last between 15-25 years with high-quality materials and good maintenance. If you stay in your house longer than that, there’s a good possibility you will need to have some maintenance done on it. Most likely, you will not have to do a full encapsulation again and the bulk of the cost will be done upfront.
Do I need a crawl space inspection after waterproofing or encapsulation is completed?
While it is not required, it is highly recommended, especially if you undertook the project yourself. A professional contractor can see things you might have missed or provide good insights for what to continue doing. The good news is that the inspection is relatively affordable, usually in the $100-250 range. We suggest you request a quote from a local company so they can provide the most accurate price.
What do I do if my vapor barrier becomes damaged?

If your vapor barrier has a small tear, puncture, or open seam, don’t panic, but do take action. You want to repair it quickly so ground moisture does not continue rising into the crawl space. For small damage under about 6 inches, clean and dry the area, then seal it with crawl space vapor barrier tape, not regular duct tape. For larger tears, place a patch of matching liner over the damaged area with at least 6 to 12 inches of overlap on every side, then tape all edges tightly. If the barrier has pulled loose from the wall, reseal it with butyl tape, termination bar, or the same fastening method used during the original installation.
If the liner is thin, has multiple tears, or is coming apart in several places, patching may not be enough. A basic crawl space vapor barrier should be at least 6 mil thick, but a more durable encapsulation liner is often 10 to 20 mil. If you see exposed dirt, standing water, or humidity staying above 60%, the issue may be bigger than the liner itself. In that case, you may need to call in a contractor to take a deeper look.
Do I need to have my crawl space encapsulated or waterproofed before I move in?
Not necessarily, but we highly recommend it. The key here is looking for the warning signs of moisture and humidity issues. You can jump back up to our section on how to know if your crawl space needs waterproofing or encapsulation. If your house is in good condition with no damage, it may not be necessary, especially right away. You can move in and then do it later.
However, with that said, it is always much easier to do preventative work than damage repair. For this reason, we suggest working with a contractor right away and getting their opinion, even if it doesn’t seem necessary. This can save headaches and additional costs further down the road.
Wrapping Up: Which Crawl Space Solution Is Right for Your Home?
You’ve made it through all the nitty gritty details of waterproofing and encapsulation. We hope we’ve answered your pressing questions, but you might still be left wondering which option is best for you.
In summary, if your crawl space has standing water, waterproofing should come first. If your crawl space is musty, humid, or exposed to ground vapor, encapsulation may be the better long-term solution. If your crawl space has both water intrusion and humidity problems, you may need a combined system.
Even though it comes with its challenges, homeownership is a wonderful thing and we are excited to be part of helping people dwell beyond the ordinary with beautiful modular homes. Call us today to learn more!
